
DIY Solo Seat Installation Steps for Harleys and Custom Motorcycles
DIY Solo Seat Install
If you want to change the look of your bike or you're currently working on a custom chopper or bobber, a solo seat with springs can be a relatively quick and easy face lift for your bike. Click below on your make/model to see a few kits and seat options available for your bike.
Drag Specialties Harley Dyna Mount Kit - What's Inside

**Seat Must be Purchased Separately**
Installation Instructions

1. Secure Bike and remove the Stock Seat
2. Position & drill using the Template provided
3. Clean & apply Rubber Pads to the Frame
4. Secure the Frame Cover
5. Install the Rear Mounts
6. Install the Rear Spring Studs & Washers
7. Remove any Hardware from Solo Seat
8. Install Seat Springs
9. Check Springs, Stud Clearance, secure and tighten Seat
*More detailed instructions are included in the Kit that will help for your specific year bike installation
FINISHED PRODUCT

Drag Specialties Mount Kit for Harley Sportster - What's Inside
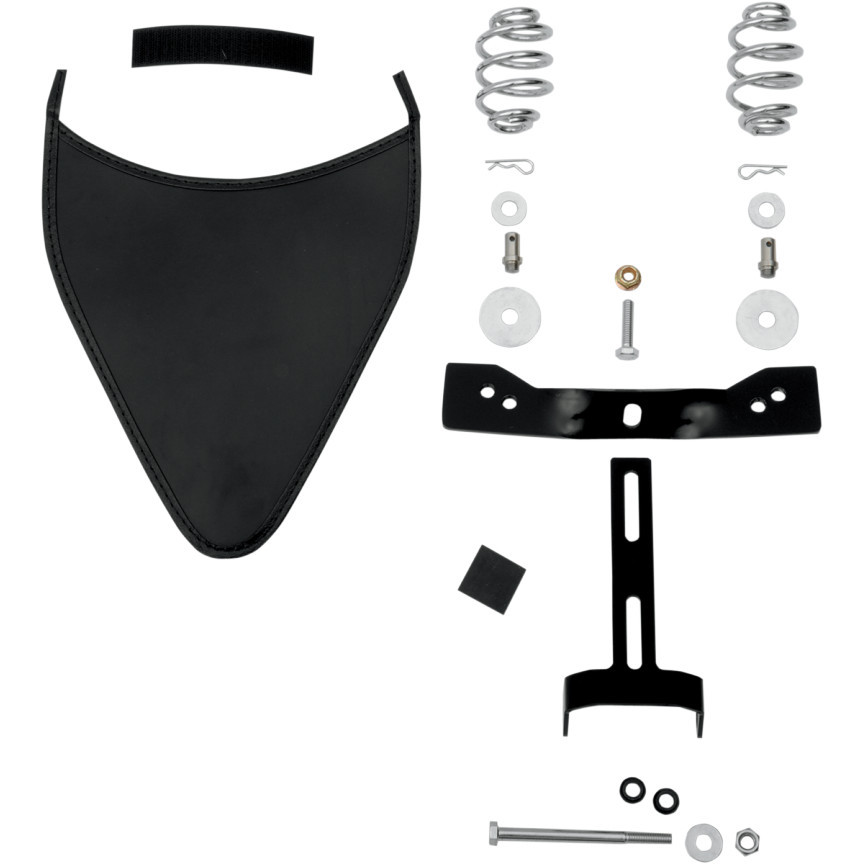
**Seat Must be Purchased Separately**
Installation Instructions

1. Secure Bike and remove the Stock Seat
2. Adjust any Wires near Frame
3. Clean the Frame Surface and install Frame Cover
4. Mount Spring Studs & Washers on Rear Mount
5. Remove Rear Fender Mount Stud/Bolt. Position and secure the Frame Cover under the Rear Mount
6. Remove any Hardware from Solo Seat and install Seat Springs
7. Check Springs & Stud Clearance, secure and tighten Seat
*More detailed instructions are included in the Kit that will help for your specific year bike installation
FINISHED PRODUCT

Custom/Rigid Seat Options - Some Necessities
- Seat Hinge
- Springs
- Perches
- Seat
Seat Hinge, Springs, & Perches can be found Here. Shop for your Seat Here.
Installation Instructions

1. Decide where to position Seat according to your comfort level
2. Measure studs on Seat Pan for distance between Spring Mounts, marking center point between Mounts
3. Preset the Mounts in place, then weld
4. Bolt Seat Pivot to Solo Seat, marking location of weld-on Seat Pivot Tab
5. Tack Seat in place, remove Allen Head Bolt, then weld Front Mount
6. Mount Solo Seat on the Pivot
7. Use Fender Washers to hold Springs in place - make certain to keep Seat level as Springs will compress when weight hits the seat
FINISHED PRODUCT

This photo shows Hairpin Springs rather than Barrel Springs. Install process remains the same.